Shiny Things Gallery | Search
Total matches for beadwork: 188
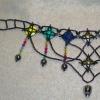
Es
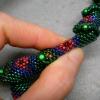
Es is pleased to meet you! Es is pleased to meet everyone! Very new to this world, they are, and interested in settling in with someone who is very willing to show them around.
I have been meaning to do this particular thing for many, many years. You know how it is with piles of things to do. Lasting... years. I had most of the beads set aside, but those deep green ones were of course one of many specific color/finish combos that got discontinued over the time when I was waiting to get to this, so I had to randomly mix in a couple of approximate colors in order to get the whole thing made. I think it worked out well, the color variants barely noticeable unless you're purposely inspecting it under bright light, and even then it just sort of adds a texture to the overall look. Making the body in individual segments and stringing them all on a satin "rattail" cord to keep flexibility and vastly increase the strength and stability of the necklace itself was also something that I had plenty of time to stumble into, and it works beautifully. The chainmaile itself turned out to be less about counter-balance than it was just a sparkly accent I wanted; the hook really doesn't need anything to keep it properly in place and... hooked, and the jump rings themselves add almost no extra weight at all. The random stone at the bottom weighs more than the copper wire chainmaile, which can of course dangle from every angle for multiple ways to wear the necklace.
At the last moment I also kind of wanted to add a "touch guide" or sorts on one side of the tail, near the hook. It's a great place to put your thumb while you're trying to guide the hook into the eye and I hope makes that process just a little bit easier if you're not in front of a mirror at the time. Things like that help me, anyway.
(For Sale.)
Shades of Control
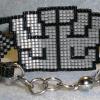
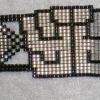
Well. I got the urge to revisit one of my old FFVII SOLDIER logo designs... and then decided I also really wanted to tack on a couple of very subtle Shinra logos. They might actually have turned out a little too subtle unless you know what you're looking at, but that's also kind of perfect.
Because I am me, a few new things were tried on the "floating steps", and I did get the hang of something that's technically a little easier on both my fingers and the beads themselves... but it left a couple of slightly loose-looking beads framing the negative space and it annoys me. Greatly. Not that it affects anything but me personally, but still. Now I know how to avoid that for next time, anyway.
Currently available.
Progress and Solidarity
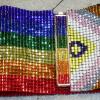
I've had this pattern worked out on my computer for ages, along with several smaller versions. But did I try the easier, faster versions first? Of course I did not. How silly.
Something something politics, I don't know, I just want everyone to have a chance at acceptance and survival and dazzlingly sparkly objects declaring such, how dare I.
Visit the Etsy page to see an actual itemized cost breakdown because I... do not want to copy it here.
(Currently Available)
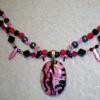
Goes With Anything
The title is somewhere between a joke and a completely sincere statement. I mean, what does a shock of pink and black not go with?
I'd been wanting to do something with these beads for weeks, but I just didn't have a centerpiece. That came from a surprising source, an acquiescence giving away a literal bag of tangled old jewelry. I untangled and disassembled all of it into component pieces, and this amazing fused glass piece was one of those things. No artist name attached, no company, just a lovely glass pendant to make use of. All of the other beads are resin (the black beads with delicate silver "cracks"), glass, dyed and natural rose quartz, and Swarovski crystals. The spring ring clasp is a heavy duty silver piece I've had for years upon years. I'm deeply pleased by how this drapes when worn.
Currently available to buy.
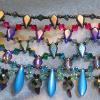
Hubris Nebula
The entire motivation for doing this: because I could. The title came from a joke between a friend and I, ending in the suggestion that I name this "Hubris", while I was going to name it "Nebula". HENCE.
A grand total of 230 Swarovski crystals, and a... bunch of other beads. Over the course of... a week..? About. I don't know, I should have been resting my hands more thoroughly but I just had to know if an idea would work. It sure did! With spectacular results and the slightly irritated realization that several of these beads are no longer in production. Happens far too often these days.
This choker is heavy, being made of crystal and glass, but every single layer is reinforced with four strands of high quality nylon thread. There are some points along two specific lines where some of the thread can be seen, or one tiny bead is missing; tension adjustment had to be done to make sure it was still able to flex and move without the thread drawing too tight and possibly wearing down to the point of snapping. Lessons have been learned here.
Available to buy.
Still Breathing
Well. ...It's personal. And something I wanted to make for me before I delved into a bunch of other projects.
Plus I was trying something a little different with the end pieces there. Success! More of this style might pop up in the near-ish future.
Despite the Inevitability of Death, I Will Live in Defiance
This one's been kicking around in my head for a while, in various forms. I picked up the Swarovski skull before anything else, seemingly ages ago... and wouldn't you know it, I never actually checked to make sure the hole was properly drilled all the way through. It wasn't, but I make it work. Like I made one broken scale bead work. Is the back a mess? Yes. That's because all these strings required extra lines, knots, and additional stabilization to make it wearable. I played with the band design for quite some time and find this to both be comfortable and sit around the neck in the way I wanted it to, plus it's incredibly customizable for the person who ultimately wishes to own it.
Basically, I wanted a sincerely impossible to miss, apparently impossible to photograph, comfortable and strong piece of """statement jewelry""" and am remarkably happy with the result. For the record, the top center jewel actually isn't black, but "dark rainbow", and getting the camera to pick up the subtle blend of darker colors is... not... a great time. I tried. The jewel which drops from that is, like the tiny jewel between the larger ones, a crystal which reflects the full color spectrum depending on the light and your position while viewing it. It's a screaming rainbow disasterpiece.
(For sale.)
